This article is a step-by-step guide covering types of lighting → color temperature → brightness → color rendering → actual selection process, suitable for:
- People preparing to install display cabinets in stores
- Collectors of models or figures
- Store owners wanting to improve product lighting
- Beginners in display design or window dressing
- Anyone interested in using LED or RGB lighting for display purposes
1. Why Is Display Cabinet Lighting So Important? (Basic Concepts)
Before choosing your lighting, it’s important to understand the four main functions of display lighting:
1. Enhance Product Appeal
Proper brightness and lighting direction emphasize the shape, material, and features of products. For example:
- Jewelry reflects more sparkle under direct light
- Food looks glossier and more appetizing
- Models appear more vibrant in color
Lighting determines the first impression of your products.
2. Help Customers See Products Clearly
Too dim makes details hard to see; too bright causes glare or reflections. Proper brightness makes purchase decisions easier.
3. Shape Brand Atmosphere
Different color temperatures and light directions can create different moods:
- Warm light → cozy, soft, handmade feel
- Cool light → professional, clean, technological
- RGB / color-changing → fun, anime, tech feel
4. Preserve the True Color of Products
Especially important for clothing, food, art, and models. High color rendering ensures colors don’t appear distorted.
2. Types of Display Cabinet Lighting (LED, RGB, Spotlights, Light Strips)
Before buying lights, understand the types of fixtures. Different lights serve different purposes:
1. LED Lights (Most Common and Recommended)
Advantages:
- Low heat → safe for food and models
- Low energy consumption → suitable for long hours
- Long lifespan → 20,000–50,000 hours typical
- Wide range of color temperatures → 3000K, 4000K, 6500K, etc.
Tip: Almost all display cabinets use LED. This is the safest basic choice.
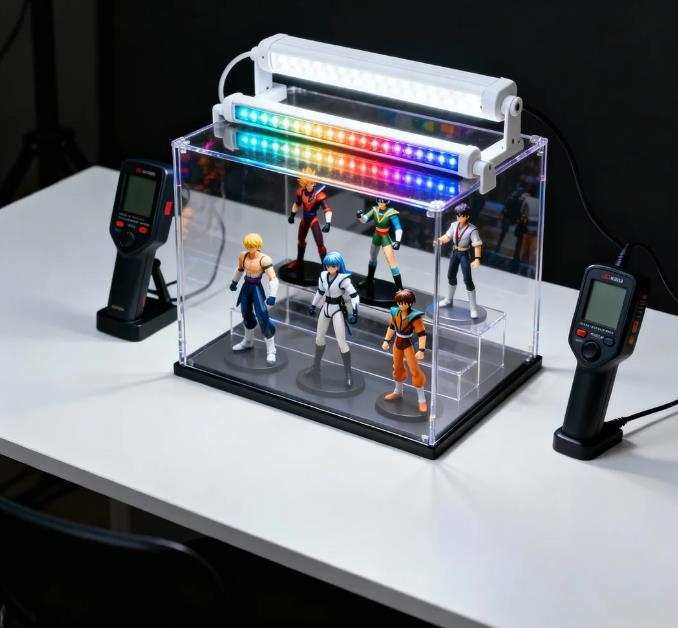
2. RGB / RGBW Mood Lights (Color Changing)
Common uses:
- Model or figure displays
- Tech product showcases
- Gaming equipment displays
- Nightclubs or bar counters
Limitations:
- Food → color appears unnatural
- Clothing → color distortion
- Jewelry → can distract from the product
Tip: Use RGB as background or accent lighting, not primary lighting.
3. Spotlights
Ideal for:
- Highlighting a single product
- Concentrated top-down lighting
- Creating shadows and depth
Common in jewelry stores, art galleries, and top-of-model displays.
4. LED Light Strips
Most common supplementary lighting in display cabinets:
- Even illumination without harsh shadows
- Easy installation
- Perfect along cabinet edges or under shelves
- Great for food, crafts, models, accessories
5. Track Lights
Best for larger display cabinets or storefront windows:
- Adjustable angles
- Available in multiple color temperatures
- Ideal for stores with many products (clothing, general goods)
3. What Is Color Temperature? What K Value Should You Use? (Core Concept)
Color temperature (K) greatly affects mood and the true color of products.
1. Quick Understanding of Color Temperature
| Color Temperature | Color | Feeling | Suitable Products |
|---|---|---|---|
| 2700–3000K | Warm yellow | Cozy, soft | Food, wood, handmade products |
| 3500–4500K | Neutral white | Natural, balanced | Clothing, general merchandise |
| 5000–6500K | Cool white | Bright, clean, tech | Jewelry, models, metal, electronics |
Quick tip:
- Food → warm light
- Clothing → neutral light
- Models and jewelry → cool white
2. Why Wrong Color Temperature Is Problematic
- Food with 6500K → looks cold and unappetizing
- Model with 3000K → appears yellowish, details lost
- Mixed color temperatures in clothing → inconsistent color, customers think items are flawed
3. Recommended Color Temperature by Product
| Product | Recommended K | Reason |
|---|---|---|
| Baked goods, cakes | 2700–3500K | Warm and appetizing |
| Jewelry, metal, gemstones | 5000–6500K | Highlight sparkle and reflections |
| Models, figures | 4000–5000K | Accurate color rendering |
| Clothing | 3500–4500K | Close to daily lighting, reduces color difference |
| Tech products | ~6000K | Clean, futuristic feel |
| Wood, creative products | ~3000K | Shows texture warmly and naturally |
4. Brightness, CRI, and Beam Angle (Advanced Knowledge)
Besides color temperature, these three indicators are essential:
1. Brightness (Lumen)
Brightness (lm) matters more than wattage because LEDs of the same wattage can vary in light output.
Suggested ranges:
- Model display → 700–1500 lm
- Jewelry spotlight → 800+ lm
- Food display → 600–1000 lm
- Clothing → overall lighting + 300–500 lm for accent
2. Color Rendering Index (CRI)
Very important but often ignored.
- CRI > 90 is essential
- Higher CRI → colors remain true
| CRI | Effect |
|---|---|
| 80–85 | General lighting |
| 90–95 | Recommended for display (accurate colors) |
| 95+ | Jewelry, art, photography grade |
3. Beam Angle
Angle affects shadow and light concentration:
| Angle | Characteristic | Use |
|---|---|---|
| 10–30° | Focused, strong highlight | Jewelry, model highlights |
| 40–60° | Even | Standard display cabinets |
| 60°+ | Wide, diffuse | Ambient lighting, supplementary lighting |
5. Step-by-Step Guide to Choosing Display Cabinet Lighting
Follow these steps to select lighting for any display cabinet:
Step 1: Determine Cabinet Size, Material, and Transparency
- Glass or wood?
- How large? How many shelves?
Tips:
- Glass cabinets → top main light + under-shelf lighting
- Wooden cabinets → embedded strips or spotlights
Step 2: Identify Product Type and Purpose
- Food? Models? Clothing? Accessories?
- Each product type requires different color temperature and brightness.
Step 3: Choose Fixture Type
Recommended combinations:
- Model display: 5000K LED strips (shelf lighting), 4000–5000K spotlights (top), RGB as optional background
- Jewelry display: High-bright 6000K spotlight (main), 5500K strips (shelves), CRI 95+
- Food display: 3000–3500K warm LED strips, avoid spotlights (heat), CRI 90+
- Clothing display: 4000K main light, 3000–3500K accent for mood
Step 4: Decide Fixture Placement and Installation
Three key positions:
- Top light → main lighting
- Under-shelf → even lighting for each layer
- Front spotlight → adds depth
Common beginner mistake: Only top lighting → shadows, uneven effect.
Best solution: Combine strips + spotlights.
Step 5: Test for Glare, Overexposure, or Color Shift
Check:
- Glass reflections
- Models too bright → details lost
- Food looks unnatural under cold light
- Any harsh spots
Adjustments if needed:
- Change spotlight angle
- Use diffusers
- Shift placement slightly
6. Common Mistakes and How to Avoid Them
- Mixed color temperatures → product color distortion → unify lighting
- Too bright → details lost → use dimmable fixtures or diffusers
- Only top lighting → dark lower shelves → add under-shelf strips
- RGB as main light → RGB should only be accent lighting
- Ignoring CRI → color shifts → always choose CRI 90+
7. Case Studies (Learn Through Examples)
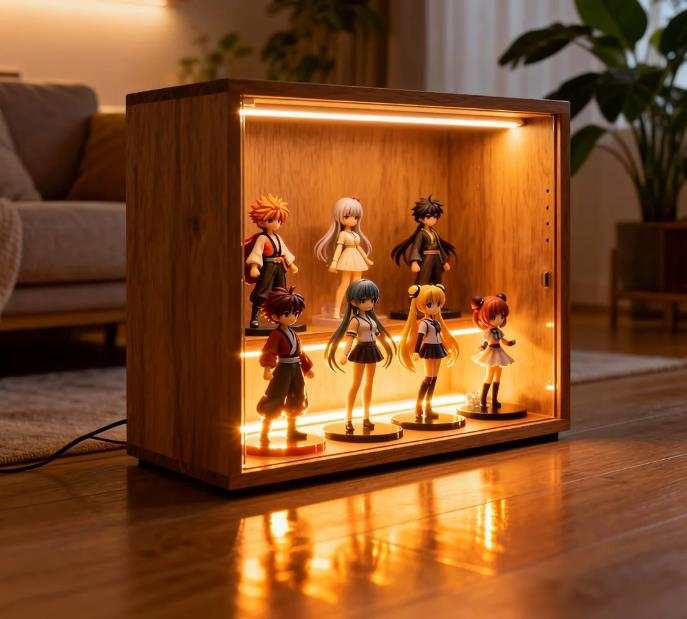
Case 1: Model Display
Goal: Accurate colors, minimal shadows, clear details
Setup: 5000K LED strips, 4000K spotlights at 30°, CRI 90+, optional RGB background
Effect: Natural, vibrant colors, clear details, adjustable mood
Case 2: Jewelry Display
Goal: Highlight sparkle, create premium feel
Setup: 6500K spotlight, 5500K shelf strips, CRI 95+
Effect: Sparkling gems, bright metals, clean and professional
Case 3: Bakery / Food Display
Goal: Make food look fresh and delicious
Setup: 3000–3500K warm LED strips, avoid spotlights, CRI 90+
Effect: Golden, glossy appearance, warm and appetizing
8. Golden Rules for Display Cabinet Lighting
- Choose color temperature first, then brightness
- CRI must be 90+
- Combine main light + supplementary strips for natural effect
- RGB only as accent lighting
- Avoid glare and overexposure
By following these steps, you can create a display cabinet that makes products look brighter, more appealing, and instantly more professional.